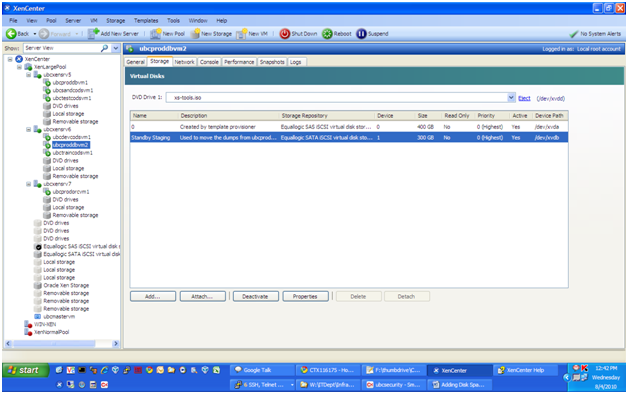
Add A New Virtual Disk Using Xen Center
First you need to add a virtual disk using Xen Center. Click on the virtual machine, then the Storage tab, then click the Add button at the bottom.
Next, enter the size of the virtual disk & choose the storage repository where it will reside, then click the create button.
Mount The Virtual Disk For the VM
Format The Virtual Disk
Next, you need to prepare the virtual disk by formatting it. To format the disk, you need to know the device name which will be listed in the Storage tab:
In this case it is /dev/xvdb
To format the disk, use the console or a terminal shell and do the following:
fdisk /dev/xvdb
Type n to create new partition
Select p or e: the partition type, say p for primary
Select partition number (1-4), say 1
For next two options, accept the default values to create partition of maximum space available.
This will create new partition /dev/sdb1 of about 5GB.
Type w to exit and save the partition table.
Next run partprobe:
partprobe
Create the File System
Then create the filesystem on the disk:
mkfs -t ext3 /dev/xvdb
Mount the Disk
Then, make a mount point and mount the disk:
mkdir /staging
mount /dev/xvdb /staging
Finally, if you want to mount the disk permanently, edit the /etc/fstab file and add:
/dev/xvdb /staging ext3 defaults 1 2


